Positionable Camera
现在,让我们进一步拓展相机的功能,首先我们为相机实现一个可以修改的fov,所谓的fov,就是指渲染图像从一边到另一边的角度。由于设置的相机宽高比不为1:1,所以fov在水平和竖直方向上的角度是不同的,在本系列博客中,我们将采用竖直方向上的fov,并且在构建相机时,我们给出指定的角度,然后在构建函数中转换到弧度。
12.1 Camera Viewing Geometry
想要调整相机的fov,实际上就是根据指定的fov角度去修改相机的视口。此前,我们是直接在代码中定义出视口高度的值,现在我们需要根据fov的角度和焦距来计算出视口高度,再根据图像的宽高比计算视口的宽度。
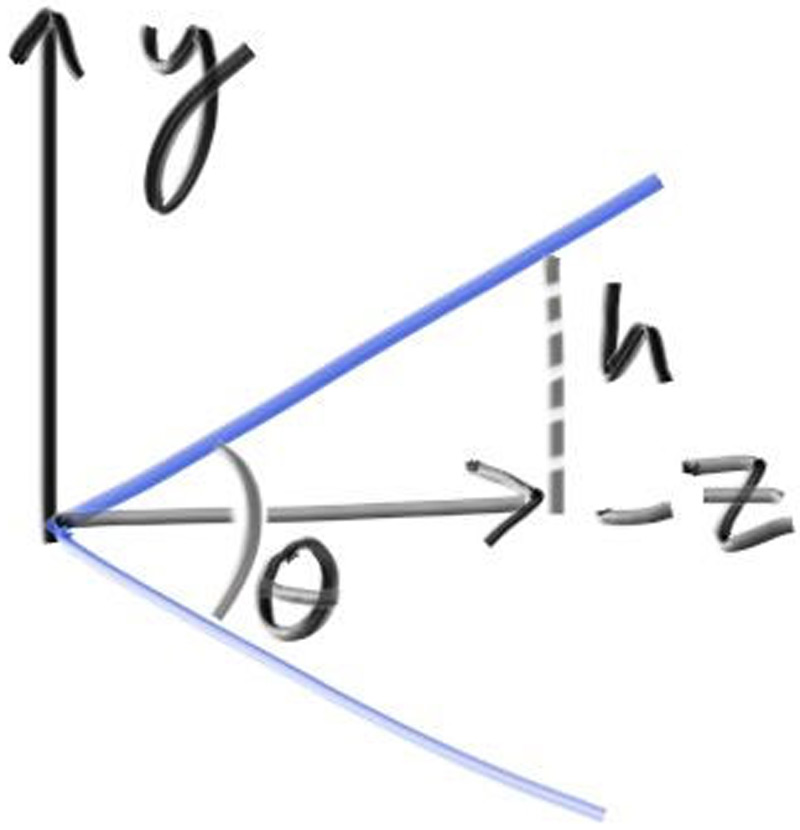
我们一步一步来,暂时不改变相机的位置,但此时相机的焦距是可以调节的,只要满足h与焦距成比例即可,如下图所示(下面的图是一个二维空间的平面图,不是三维的,当初疑惑了好久。。):
从图中也不难推导出:\(h = \tan(\frac{\theta}{2})\),所以camera类的代码就变为了:
1
2
3
4
5
6
7
8
9
10
11
12
13
14
15
16
17
18
19
20
21
22
23
24
25
26
27
28
29
30
class camera
{
public:
    double aspectRatio = 1.0;   // ratio of image width over height
    int imageWidth = 100;       // rendered image width in pixel count
    int samplesPerPixel = 10;   // count of random samples for each pixel
    int maxDepth = 10;          // maximum number of ray bounces into scene

    double verticalFOV = 90; // vertical view angle

    void render(const hittable& world) {...}

private:
    ...

    void initialize()
    {
       ...

        // determine viewport dimensions
        double focalLength = 1;
        double theta = degreesToRadians(verticalFOV);
        double h = tan(theta / 2);
        double viewportHeight = 2 * h * focalLength;
        double viewportWidth = static_cast<double>(imageWidth) / imageHeight * viewportHeight;

        ...
    }

};
这里就暂时不修改测试场景了,因为修改fov是一个比较小的功能
12.2 Positioning and Orienting the Camera
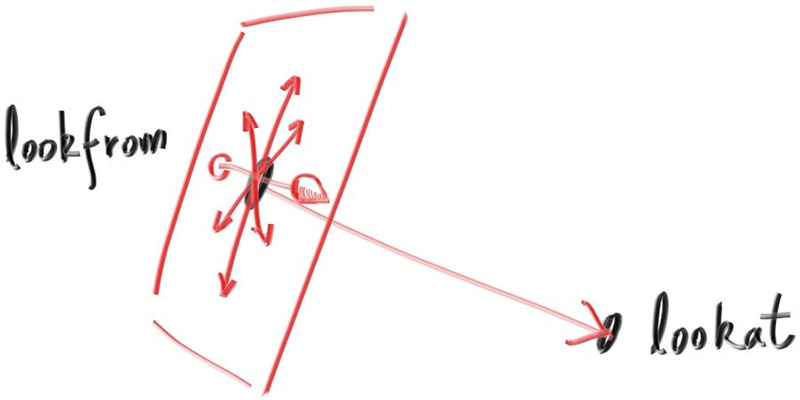
首先,我们将相机所处的位置命名为lookfrom,相机所看向的位置命名为lookat。如果我们想要实现用任意视角观察场景的功能,我们需要能够描述出相机的一个属性roll,也就是相机围绕lookfrom-lookat所在轴上的旋转角度。具体的做法是定义出相机的up向量。
或者我们也可以这样理解:对于人来说,头和鼻子的相对位置是固定的,但是我们仍然可以在生理允许的范围内旋转脑袋,如下图所示(请忽略表情包上的文字,如果冒犯,我表示抱歉~):
我们对于下面这个计算过程应该很熟悉了:我们首先指定一个view up向量,通过cross product构建一个相机的坐标空间(u, v, w),其中u表示指向相机右侧的单位向量,v表示相机的up向量,w则是指向相机观察方向相反的单位向量(因为我们所使用的是右手坐标系)。如下图所示:
重构的class类的代码如下:
1
2
3
4
5
6
7
8
9
10
11
12
13
14
15
16
17
18
19
20
21
22
23
24
25
26
27
28
29
30
31
32
33
34
35
36
37
38
39
40
41
42
43
44
45
46
47
48
49
50
51
52
53
54
55
56
57
58
59
60
class camera
{
public:
    ...

    double verticalFOV = 90;    // vertical view angle
    point3 lookFrom = point3(0, 0, 0);
    point3 lookAt = point3(0, 0, -1);
    vec3 viewUp = vec3(0, 1, 0);

    ...

private:
    int imageHeight = 1;          // rendered image height in pixel count
    double sampleScaleFactor = 0; // color scale factor for a sum of pixel samples
    point3 center;                // camera center
    point3 firstPixelLocation;    // location of pixel 0, 0
    vec3 pixelDeltaU;             // offset to pixel to the right
    vec3 pixelDeltaV;             // offset to pixel below
    vec3 u, v, w;                 // camera basis vectors

    void initialize()
    {
        imageHeight = static_cast<int> (imageWidth / aspectRatio);
        imageHeight = imageHeight < 1 ? 1 : imageHeight;

        sampleScaleFactor = 1.0 / samplesPerPixel;

        center = lookFrom;

        // determine viewport dimensions
        double focalLength = (lookFrom - lookAt).length();
        double theta = degreesToRadians(verticalFOV);
        double h = tan(theta / 2);
        double viewportHeight = 2 * h * focalLength;
        double viewportWidth = static_cast<double>(imageWidth) / imageHeight * viewportHeight;

        // calculate the u, v, w unit basis vectors for the camera current position
        w = unitVectorLength(lookFrom - lookAt);
        u = unitVectorLength(cross(viewUp, w));
        v = cross(w, u);

        // calculate the vectors across the horizontal and vertical viewport edges
        vec3 viewportU = viewportWidth * u;
        vec3 viewportV = viewportHeight * -v;

        // Calculate the horizontal and vertical delta vectors from pixel to pixel
        pixelDeltaU = viewportU / imageWidth;
        pixelDeltaV = viewportV / imageHeight;

        // calculate the location of the upper left pixel
        point3 viewportUpperLeft = center - focalLength * w - viewportU / 2 - viewportV / 2;
        firstPixelLocation = viewportUpperLeft + 0.5 * (pixelDeltaU + pixelDeltaV);
    }

	...

private:

};
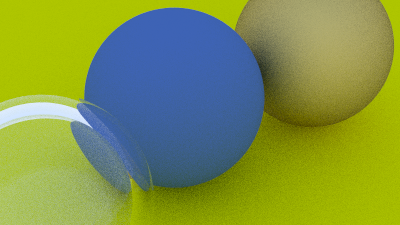
现在,我们可以更新测试场景来试试新的相机了:
1
2
3
4
cam.verticalFOV = 20;
cam.lookFrom = point3(-2, 2, 1);
cam.lookAt = point3(0, 0, -1);
cam.viewUp = vec3(0, 1, 0);
渲染中。。。


